Sebagian pengguna android biasanya kesal bila sedang mendegarkan music namun tidak sengaja menghapus daftr aplkasi yang berjalan dan aplikasi musiknya pun ikut terhenti. Apa kamu salah satunya yang kesal dengan kejadian seperti itu? Ya kali ini saya akan memberikan solusinya agar Player music tadi tetap berjalan meskipun kamu menghapus recent app list
Oke langsung saja berikut caranya:

1. Download Tasker

2. Open Tasker, select + button then select Application


3. Check App, Services, Invert, All in the bottom, search Music app and select, then click Back


4. If you’re prompt for Accessbility services just click OK, then turn ON Tasker services


5. Then select New Task and give a name as you want, then click ü button. Then in Task Edit click + button

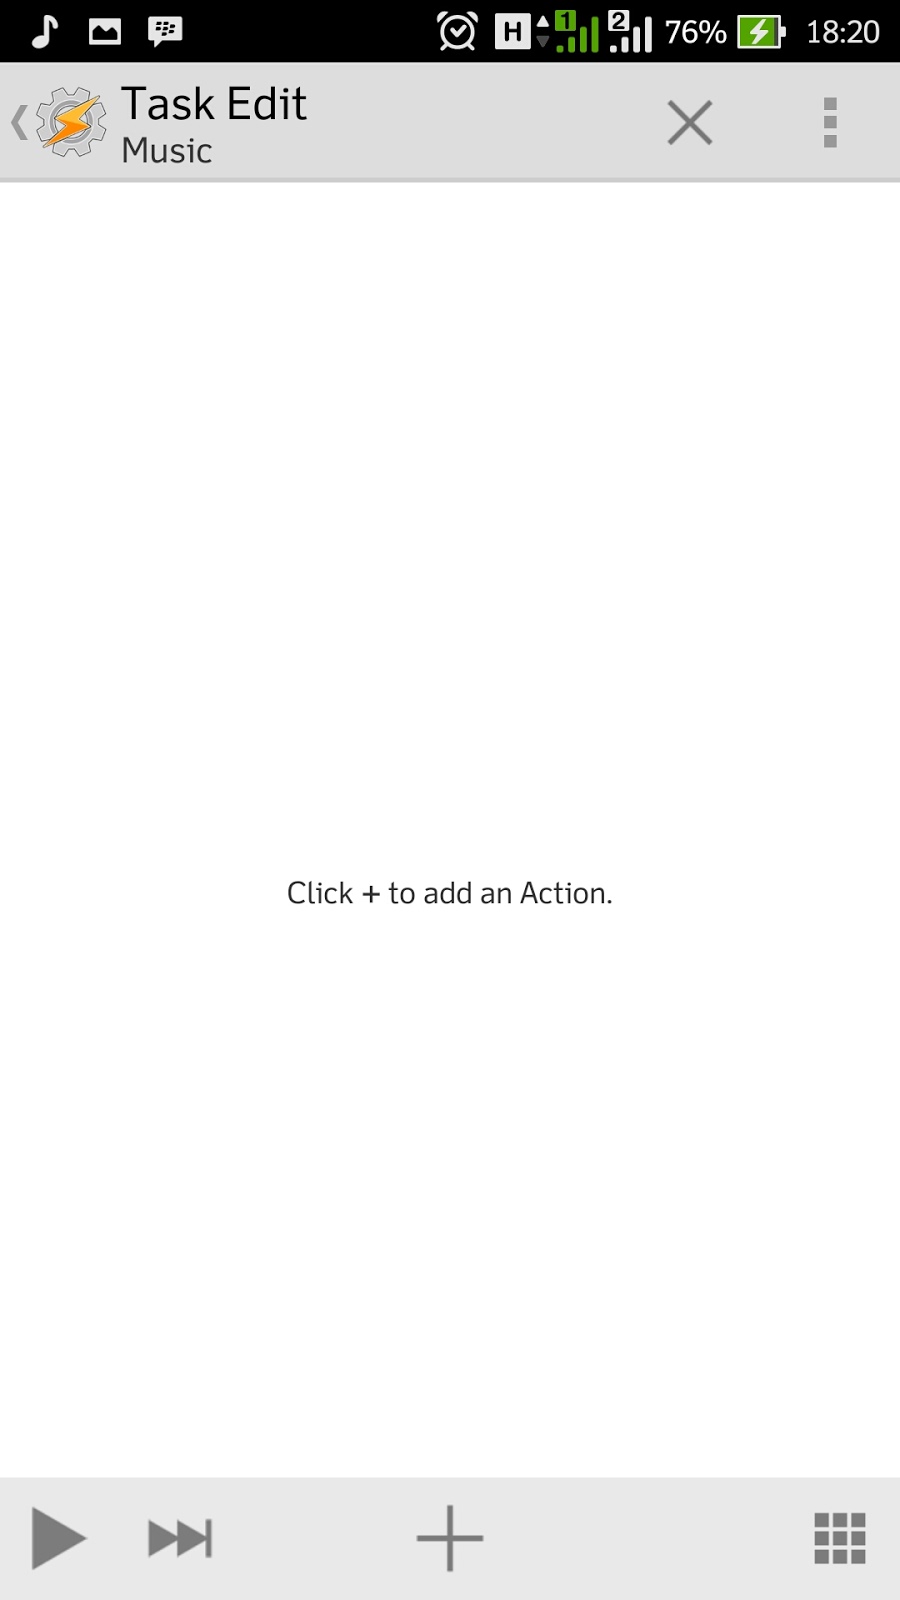
6. You must select a category, just choose App


7. Then choose Launch App

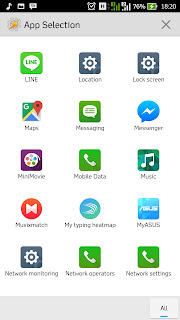
8. In app selection, choose Music again

9. Then in action edit check Exclude From Recent Apps option

10. Finally, your task is done and you can test by click Play button in the bottom


11. Now you can see in recent app list nothing music player now


Written by Agung Pambudi. Copyright © “Everything you Want”. All right reserved.

DO NOT COPY-PASTE TO YOUR SITE WITHOUT OUR PERMISSION!

JUST GET OFF FOR PLAGIATOR!

1.      Download SP Flash Tool here (*click)
2.      Download Stock Firmware here (*click)
3.      Extract downloaded file “otf_spftool_15.05.17.7z
4.      Open SP Flash Tool folder, run “flash_tool.exe
5.      Select Download tab and select “Scatter-loading

6.      Browse the folder that you extracted stock firmware
7.      Select “MT6752_Android_scatter.txt” then click Open


8.      After that select “Firmware Upgrade” and click “Download” button

9.      Turn off the phone, hold Volume down button, then plug your device trough USB to the PC

10.  Wait until progress is Done (you can release volume down button if the progress are running)
11.  Unplug USB cable, then Reboot your phone
12.  VOILA! you're done!

* be sure device driver has been installed correctly before.
* you can use PdaNet+ for installing driver automatically http://pdanet.co/
* tested by me on Windows 10 Pro 64bit


Written by Agung Pambudi. Copyright © “Everything you Want”. All right reserved.

DO NOT COPY-PASTE TO YOUR SITE WITHOUT OUR PERMISSION!

JUST GET OFF FOR PLAGIATOR!


Oke ane mau berbagi info bagaimana cara agar si Android terutama yg pake processor Mediatek dapat lock GPS dengan cepat, langsung aja:

Bahan-bahan yang dibutuhin:

Cara pemakaian:

1. Jalankan aplikasi FasterGPS
2. Atur setting dengan isian sebagai berikut
Continent:ASIA
Region : Indonesia
*Current server akan berubah otomatis menjadi: id.pool.ntp.org

Pilih advanced settings, lalu isi dengan:
DEBUG_LEVEL : 5
INTERMEDIATE_POS : 1
ACCURACY_THRES : 0
ENABLE_WIPER : 1
SUPL_PORT : 7276
SUPL_HOST : supl.google.com
CURRENT_CARRIER : common
DEFAULT_AGPS_ENABLE : TRUE (huruf besar)
DEFAULT_SSL_ENABLE : FALSE (huruf besar)
DEFAULT_USER_PLANE : TRUE (huruf besar)
*yang tidak disebutin kosongin/biarkan saja
lalu Restart

3. Buka GPS Test dan perhatikan nilai accuracy, kalo udah gak 0 lagi berarti agan telah berhasil mengatur location set by GPS
4. Jika belum berhasil, coba masuk kembali ke FasterGPS, pilih revert to old gps.conf, dan ulang kembali tahap 1 s.d. 3
5. Enjoy!

kelebihan menggunakan GPS:

  • posisi lebih akurat, terutama ketika outdoor
  • hemat biaya, kita bisa tau posisi tanpa perlu koneksi data internet krn informasi ditarik dari setelit


Cara Alternatif:
Trik mempercepat lock selain menggunakan FasterGPS, adalah dengan mengedit secara langsung file gps.conf (lokasi di folder\etc). Caranya:

1. Masuk ke direktori /etc melalui Root Explorer
2. Ubah seluruh isi file gps.conf pada folder tsb dengan isian sbb..
NTP_SERVER=id.pool.ntp.org
NTP_SERVER=0.id.pool.ntp.org
NTP_SERVER=1.id.pool.ntp.org
NTP_SERVER=2.id.pool.ntp.org
NTP_SERVER=3.id.pool.ntp.org
NTP_SERVER=3.sg.pool.ntp.org
NTP_SERVER=0.asia.pool.ntp.org
NTP_SERVER=3.asia.pool.ntp.org
XTRA_SERVER_1=http://xtra1.gpsonextra.net/xtra.bin
XTRA_SERVER_2=http://xtra2.gpsonextra.net/xtra.bin
XTRA_SERVER_3=http://xtra3.gpsonextra.net/xtra.bin
ENABLE_WIPER=1
INTERMEDIATE_POS=0
DEFAULT_AGPS_ENABLE=TRUE
DEFAULT_USER_PLANE=TRUE
DEFAULT_SSL_ENABLE=FALSE
DEBUG_LEVEL=0
CURRENT_CARRIER=common
ACCURACY_THRES=0
SUPL_PORT=7276
SUPL_HOST=supl.google.com

3. Save dan restart
4. Pastikan mount telah diset ke read and write (R/W) melalui menu Root Explorer
5. Enjoy!


source